Learn how to make beautiful, food safe dishes with alcohol inks using this easy to follow tutorial!
A long, long time ago I wrote a post about using Stazon inks and stamps to decorate dishes. (It was one of my earliest posts on The Artisan Life!) It's been incredibly popular over the years.
One of the most common questions people have consistently asked is whether or not the stamped surfaces are food safe. I've never personally felt comfortable eating off the stamped portions of any decorated dishes, and feel like you'd be pretty likely to mess up the design.
When I was organizing and cleaning after our recent trip to WV, I came across a set of glass bowls originally purchased for our DIY wedding reception and I had an exciting idea. The idea worked out, so today I'm excited to share how to make food safe dishes with alcohol inks!

This post may include affiliate links, which means I may make a commission on purchases made through these links at no additional cost to you.
You can use this technique with plates, bowls, or glasses - it really doesn't matter! Blend the colors or choose just one color per piece; again, the choice is yours. This project is a really great way to spruce up some old glass dishes or enhance thrift store/yard sale finds!
Materials needed for food safe dishes with alcohol inks
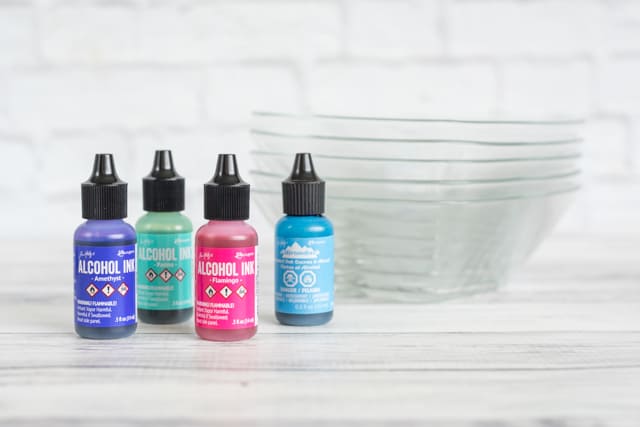
- Alcohol inks! There are several different brands, but I happen to own/use Ranger Adirondack
- Alcohol ink blending solution or rubbing alcohol
- Alcohol ink applicator
- Glass dishes
- Foil for protecting your work surface - optional but recommended
- A sealant - I recommend an acrylic spray sealant and/or dishwasher safe Mod Podge and a brush to apply it with.
- Always make sure to choose water-based sealants for alcohol ink to avoid smudging and smearing. Krylon "Short Cuts" and Krylon Kamar Varnish both typically work with alcohol ink, but you may need to experiment to find what works best for you and your project. No matter which sealant you use, allowing your ink to set for up to a day can help it not smear.

- Permanent, Fast Drying, Transparent, Acid Free Dye Ink Specially Formulated To Create A Vibrant, Polished Stone Look
- Use On Glossy Paper, Dominoes, Metal, Foil, Shrink Plastic, Glass And Other Slick Surfaces
- 5 Fluid Ounce Each In Flamingo, Patina, And Amethyst
How to make food safe dishes with alcohol inks
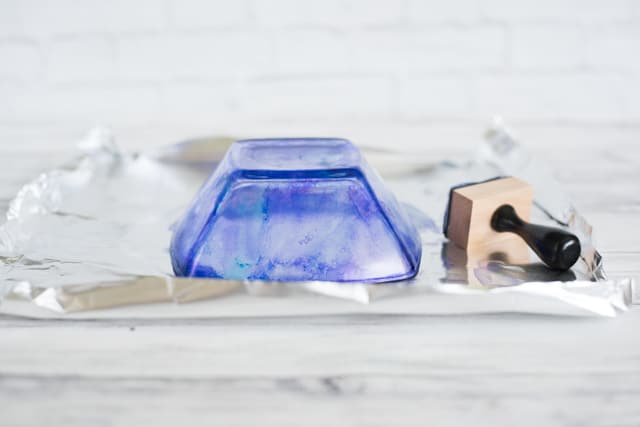
To begin with, make sure your dish is dry and clean. I highly recommend wiping down the outside with a paper towel and alcohol ink to make sure there aren't any residues, oils, etc. to interfere with the ink.
Protect your work surface! Alcohol ink will stain. Ask me how I know this 😉 I suggest using a piece of aluminum foil with slightly curled up edges to make sure nothing leaks off and on to your table.
Once your dish is dry and clean, you're ready to get going!
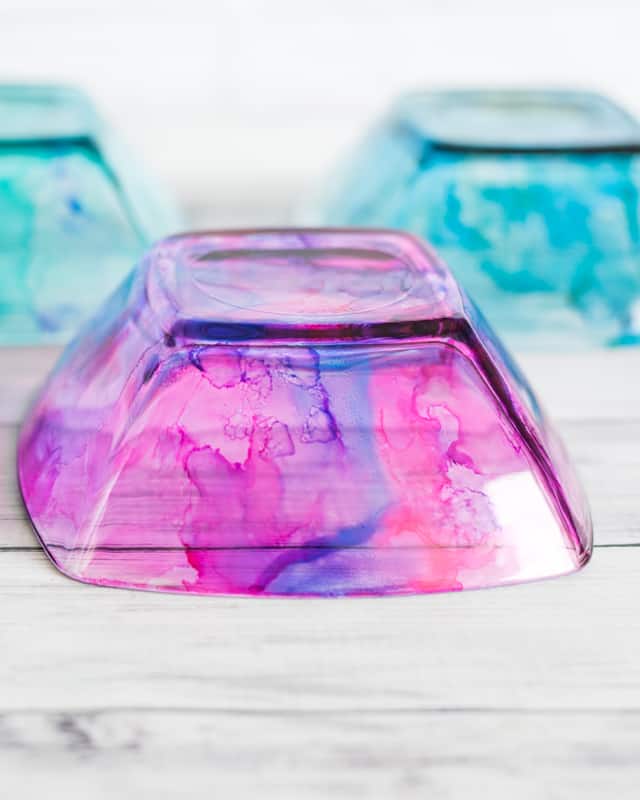
You will be painting the outside only of your dish with alcohol ink. That's how these dishes will be safe to eat off of!
I recommend wetting the outside of your dish with blending solution or rubbing alcohol and then working quick with your applicator, or simply by dripping the ink on, to apply the ink.
The ink likes to flow where it's already wet, so applying a bit of blending solution/alcohol ahead of time can help encourage the colors to mix.
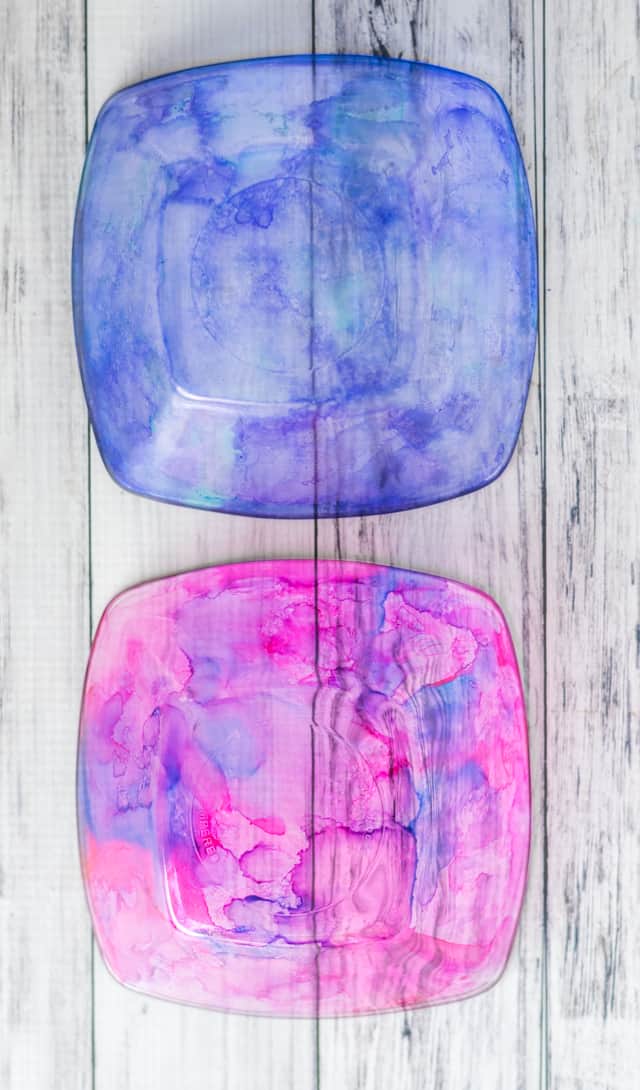
If you'd prefer, you can also just dab the inks on without using a solution beforehand. I made my bowls in mostly one color each, with a little bit of a second color for variety in the individual bowl/continuity in the entire set.
For more vibrant colors, add additional layers of ink when the underlying application is either dry or mostly dry.
Allow the dish to fully dry, then apply your sealant according to directions.
I highly recommend turning your dish upside down to protect the inside, spraying the outside with a sealant, and then using dishwasher safe Mod Podge once the spray sealant is dry. Two light coats of sealant work better than one thicker coat.
You don't have to seal the dishes, but it will help the inks last longer! Plus there's the cool added benefit of being able to put your dishes in the dishwasher (but you really do have to wait basically a month for the Mod Podge to cure fully!).
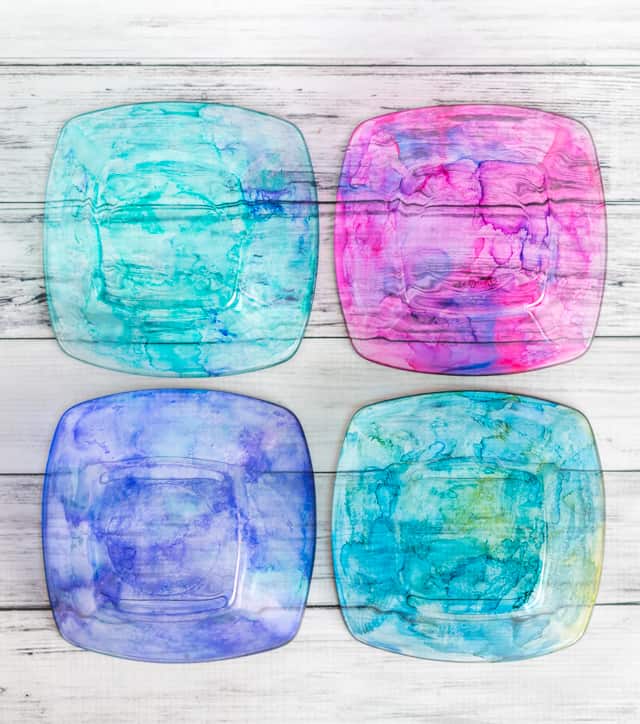
Aren't they so colorful and lovely? I'm in love with these bowls and want to make some glasses to match ASAP!
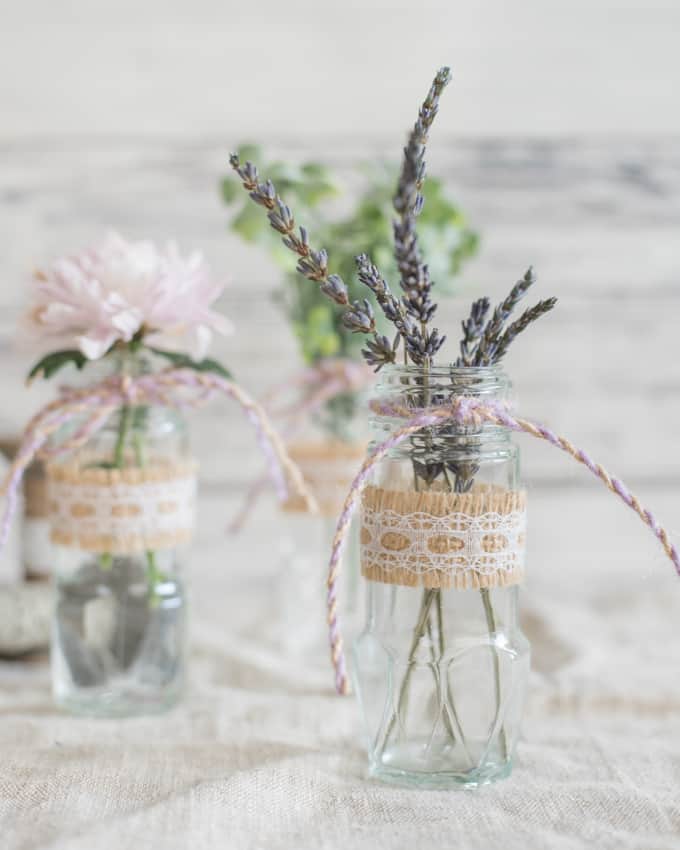
It's so much fun to turn unused items around the house into something 'new' and lovely! If you don't have any glass dishes sitting around, you can always do this project with upcycled jars to make some lovely vases or storage cups for pens, paintbrushes, etc.
If you're looking for more upcycled glass jar ideas, please stop by my upcycled jar craft tutorials roundup! You'll find a variety of projects for different shapes and sizes of jars. 🙂
What's the last thing you upcycled?
QQ
Question: After brushing on the modge podge...did you heat them in the oven? I’ve seen some tutorials do so?
Natasha
I actually did not Mod Podge these particular bowls. The dishwasher sealant version of Mod Podge does cure more quickly in the oven (it takes about a month to cure without the oven), so you certainly can. If you do, just make sure to allow your bowls to heat and cool with the oven so they don't crack!
QQ
Thank you!! i think I will try it this way since they came out super cool so far, and I dont “need” em right away but before doing that though... in your opinion, would a second layer of Modge podge be necessary?
Natasha
If you're using the dishwasher safe Mod Podge, it suggests applying multiple coats 2-3 hours apart for maximum protection.
Meg
What sealant did you use. I was told sealant needs to be water based and how long did you wait before you sprayed sealant. I would like to make ceramic coasters.
Natasha
The Ranger Gloss multi medium sealant is designed to work with alcohol inks, but ModPodge works well, too. I recommend using a sealant you brush on, not a spray version, as the spray propellant can mess with the ink. You can seal it pretty much immediately because alcohol ink dries very fast. I hope that’s helpful!